Category: WordPress

  • Upgrade Amazon Lightsail Bitnami WordPress using All-in-One WP Migration Plugin

    Upgrade Amazon Lightsail Bitnami WordPress using All-in-One WP Migration Plugin

    One of the hardest problems with upgrading the Amazon Lightsail Bitnami WordPress is upgrading PHP.

    In this walkthrough, I’ve detailed the steps that I’ve taken to upgrade from an older Bitnami WP Lightsail to their latest image 🙂

    Note the following:
    – This post is a work in progress and I will provide additional details continuously.
    – Also, you will need a “Unlimited Extension” purchased from the plugin vendor.

    What We Need to Do

    The steps we’ll be doing at a high level:

    • Download the WP Plugin: All-in-One WP Migration plugin
    • Install the new plugin.
    • Create a backup with the new plugin.
    • Export and download your new backup file.
    • Deploy the latest AWS Lightsail for Bitnami WordPress
    • Download the PEM file associated to the new server.
    • Detach static IP from old server to new Bitnami WP server.
    • Change All-in-One backup folder ownership temporarily to allow SFTP via SSH
    • Use FTP software to SFTP to new server and upload the backup file to AIO backup folder.
    • Change AIO backup folder ownership back to original folder ownership.
    • In /wp-admin AIO backup, restore from backup file.

    Download the WP Plugin

    Install the AIO plugin from /wp-admin -> Plugins -> Add New

    Search for “all in one WP migration” as shown below and click “Install Now” from ServMask:

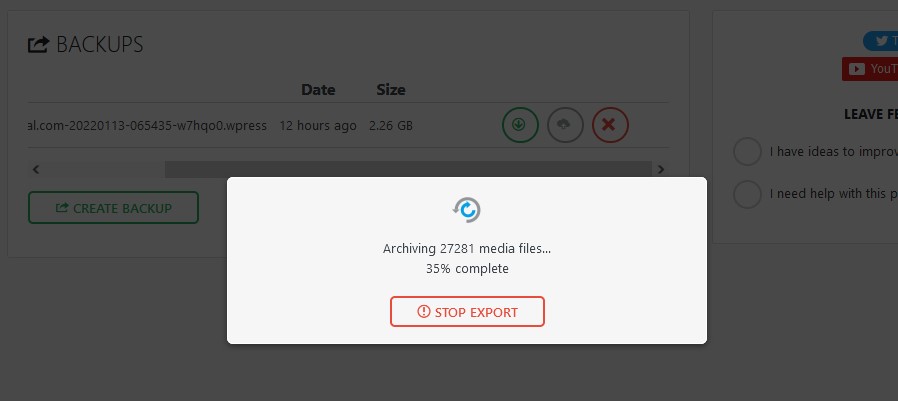
    Create a Backup with the New Plugin

    From All-in-One WP Migration (/wp-admin menu), click Backups

    Click “Create Backup” and you should see the progress:

    When that is completed, click the green arrow on the right of the new backup to download it.

    Deploy the latest Amazon Lightsail for Bitnami WordPress

    The following steps will help us deploy the latest Bitnami WordPress in Amazon Lightsail:

    • Log on to AWS and open up Amazon Lightsail.
    • Under Instances, click “Create Instance”.

    You’ll be presented with a selection of instances you can launch. You’ll see the latest supported WordPress version. As of this writing, it is version 5.8.3.

    Amazon Lightsail - Select Instance

    Scrolling down you’ll find more options. The most notable options you’ll want to pay attention to:

    • Change SSH key pair
    • Choosing an instance plan
    • Identify your instance

    Change SSH key pair

    I left it at default but this will be used to SSH/SFTP into your machine. You’ll be able to download the default key later if you haven’t done so already. I’ll cover that more later.

    Choosing an instance plan

    Up to you, but if it’s for testing do the $3.5 🙂 I recommend the $5 if this is your main instance. You could scale up later on.

    Identify your instance

    Any name will work here.

    Download the PEM file associated to the new server

    In order to connect to your server through your SFTP application, you ‘ll need the username and the private key associated to your Lightsail server.

    Get Username

    Do the following to attain the username:

    1. Ensure you’re in the Amazon Lightsail section of AWS 😉
    2. Under instances, click on the title of the instance you want to manage.
    3. Under connect, you’ll find your username. Most likely “bitnami” since you’re using a Bitnami image.

    Get Private Key

    From the Amazon Lightsail administrative screen:

    1. Under instances, view which region your server is located. It’s located as the last line in the gray card. If you’re from the USA, it could be either Oregon, Ohio, Virginia.
    2. From the top-right, click: Account
    3. From the drop down, click: Account
    4. Click “SSH Keys”
    5. Download the associated SSH key that works with your server. It’ll usually list out which key is associated to which region.

    Detach static IP from old server to new Bitnami WP server

    In Progress 😊

  • Local WordPress Development

    Local WordPress Development

    About

    The purpose of this guide is to help you create a local WordPress development server on your laptop using Docker.

    Requirements

    • You have Docker installed.
    • You already know how to use Docker.
    • Create a project folder that will contain all these files. This can be anywhere on your computer. Example: ~/Code/WordPress-Test

    Create MySQL Docker Container

    Create a new MySQL instance (if you don’t already have one) so your WordPress can use it as its database. Save the following to the root of your project folder.

    Run the following:


    docker-compose up -d

    Before running a WordPress container, create a schema. For this example, I’ll use the schema name “wordpress-dev”.

    Create WordPress Docker Container

    Use the following Gist to create your Docker container.

  • WooCommerce Roles & Capabilities for Custom Shop Manager Role

    WooCommerce Roles & Capabilities for Custom Shop Manager Role

    One of my projects required me to create a new role based on the Shop Manager role provided by WooCommerce.  Essentially, I need to develop a custom plugin to disable many of the administrative functions provided by WordPress and use a Roles & Capabilities plugin to lock the Shop Manager to only WooCommerce.

    Roles & Capabilities Plugin

    I used the following plugin to help me manage the roles & capabilities of my WordPress permissions: Advanced Access Manager

    Adding New Orders

    Location: WooCommerce -> Orders -> Add Order

    The following capability is required in order to manage shop orders

    • manage_woocommerce
      • This may give too much “admin” access so make sure to use Advanced Access Manager to further eliminate access you need.
    • edit_shop_orders
    • view_woocommerce_reports
    • edit_posts
      • This will give the user the ability to edit posts too (make sure to remove this from side & admin bar menu.
  • Importing WordPress Media from Another WordPress Instance

    Importing WordPress Media from Another WordPress Instance

    I have two similar WordPress instances.  One of the WordPress instances had a lot of work done to a single page that needed to be replicated to the other WordPress instance.

    Export Media from WordPress Instance

    The following are the steps in order to migrate the contents of that page to the other WordPress instance you have.  From the site you did heavy work from:

    • Copy the recent folder with the files you uploaded: /wp-content/2018/05
    • Go to: /wp-admin
    • Navigate to: Tools -> Export
    • Click: Media
    • Click: Download Export File

    Import to Other WordPress Instance

    On the WordPress instance you want to copy the contents to:

    • Upload this folder (/wp-content/2018/05) to the other WordPress instance at the same location.
      • Ensure you have the appropriate permissions to upload to the /wp-content folder. You can give SSH access by doing the following: chown -R ubuntu:www-data /wp-content
    • Navigate to: /wp-admin
    • Navigate to: Tools -> Import
    • Click: Run Importer
    • Click “Choose File” and select the XML that was exported earlier.

  • WooCommerce Subscription Rest API Plugin

    WooCommerce Subscription Rest API Plugin

    Fulfillment companies looking to utilize WooCommerce Subscription sometimes need additional meta data about the # of orders from a subscription.

    Or perhaps the subscription ID of the order?  I’ve included this information in a WooCommerce plugin.  This is especially useful for fulfillment companies.

  • IAHSP Europe

    IAHSP Europe

    We have a new website that I helped put together with my team.  We used WordPress, Angular 5, Google Cloud Functions, and AWS.

    I’m very proud of the work everyone did to help build such an awesome website.  I’m especially proud to be part of a global association for all Home Stagers across the world.

  • WordPress Private Pages

    WordPress Private Pages

    Use the following code snippet to make a theme page that is private.  It will require the user to log on their administrative WP page as a user to view the contents on this page.

  • BeWorkPlace.com

    BeWorkPlace.com

    Completed an AWS deployment project for a WordPress website using AWS Lightsail, RDS, S3, CloudFront, CloudWatch 😀

    Visit their website at BeWorkPlace.com

  • Disabling WooCommerce Reviews

    Disabling WooCommerce Reviews

    One of the websites that I worked on requested to remove the WooCommerce Reviews.  You could use the mini-plugin that I’ve developed to help you take care of that:

    WooCommerce Remove Reviews

    To install the WooCommerce plugin, do the following:

    • Go to the plugin URL: WooCommerce Remove Reviews
    • Click the green button that says: Clone or Download
    • Then click: Download ZIP
    • Use this ZIP file to upload to your WordPress plugins.
  • Adding WP Action & Filter Hooks

    Adding WP Action & Filter Hooks

    There are two types of WP hooks that can be used to extend the abilities of WP functions.

    Filter Hooks

    The following will output “Hooked: Home” to the “the_title” WordPress function on every call to the function.

    add_filter("the_title", "dl_title");
    function dl_title($title) {
      return "Hooked: " . $title;
    }

    Important: This will always return something.

    Action Hooks

    After the exection of the wp_footer, the following verbiage will output AFTER: Shoutout to all the WordPress devs!

    add_action("wp_footer", "dl_footer_shoutout");
    function dl_footer_shoutout() {
      echo "Shoutout to all the WordPress devs!";
    }

    Prioritization

    Specific functions can be called at different times using prioritization.